Friday, July 31, 2020

Taking a break from my Patio Picnic Pattern

For a little Christmas in July!


Just a couple Christmas mug rugs for my friends Roy and Teresa.

Anyone else working on Christmas yet?

Thursday, July 30, 2020

What I have learned so far...

The instructions for the Patio Picnic quilt have this nice little page in the back where you can write notes and things you have learned while making this quilt.


I like that idea. 
That way, should you make it again, you will have your notes to help with the next one.

I have started piecing a few blocks.


Even using a design board (baking pan and batting 😉) it is so easy to get confused about which direction these tiny little squares are sewn together.


You may think you have them all lined up correctly, sew them together, and THEN find out you have one upside down and must take the entire thing apart and resew it.
Not once, not twice but several times.

AAAAAAAAAAHHHHHHH.....
😖


So, here's what I have learned so far.


If I can ever step away from my seam ripper long enough, I will try to keep you updated on my progress.
No, seriously...
My seam ripper and I have now become one.

Tuesday, July 28, 2020

Instructions

They are there for a reason.

The person who took the time to write the instructions assumes you are going to actually read and FOLLOW them.
Again, they are there for a reason.

My mother taught me the art of quilting many years ago.
 My mother always pressed her seams open and taught me to do the same.

I have found many quilters press to the dark.
The instructions for this pattern say to press seams open unless otherwise indicated.

Since I chose a white background for my Patio Picnic quilt I decided it might be best to press the seams to the dark side.


I WAS WRONG.

I found after stitching my first block it was way too bulky in all the tiny little intersections.
 Rather than fighting with it, I decided to go back and press the seams open on each and every tiny little 1 1/2" square.
It took me an hour.


The moral of the story...

Save yourself an hour and 
FOLLOW THE INSTRUCTIONS.
They are there for a reason.

Sunday, July 26, 2020

Moving right along...

I am really loving the 1" half square triangle paper I received in my Sew Sampler Box.


It's super easy to use.
Just follow the arrows and sew on the dashed lines.


The pattern calls for 5 eighteen square sections.

 
Once they are sewn, cut apart, the paper peeled off and pressed you will end up with five adorable little stacks of 1 1/2" squares.


Yep.
Cute, aren't they?


Theses are so tiny.
I would never have been able to sew these without the triangle paper.

I will have to say if you are someone who likes a clean, neat sewing table,
these might not be for you.

 
What a mess!


But, worth the mess in the end.


Don't you think?

Friday, July 24, 2020

Improvise

I have been cutting the fabric for my Patio Picnic pattern.

There are so many little pieces to keep track of.

 Unfortunately, neither was in my budget this month. 

I decided to improvise and use what I had.

I drug out the ol' Scrabble game and sorted through all the letters until I found A through Z.
   

I then cut a piece of cotton batting to fit the bottom of a 18" x 13" baking sheet.

It works perfectly to hold and keep my pieces in order.


 I cut 189 itsy bitsy 1 1/2" squares for letters F and G.


All pieces cut and ready to go.

See ya soon..... 

Tuesday, July 21, 2020

Sew Sampler Box July 2020

A few weeks back I signed up to receive the Sew Sampler Box from The Fat Quarter Shop.
They do have a waiting list, but it didn't take long for my name to come up.

I was so excited when they contacted me to let me know they had opened new spots.

If you're not familiar with the Sew Sampler Box it's $24.95 a month and full of goodies.
You receive your box once a month and it includes an assortment of really cool stuff.
Usually fabric, notions, patterns, discount coupons and more.

Sounds like fun, doesn't it?
Maybe it's because this was my first box and I was so excited, but it seems like it took
 F-O-R-E-V-E-R
 to get here.
Of course it didn't.
I received the invoice via e-mail on July 16th and received it in the mail July 21st.

It was so worth the wait!

First, look at the adorable little box it comes in.


When you open it this is the first thing you see.


A little clue of what's inside.
 When you turn it over it has coupon codes for purchases from The Fat Quarter Shop.
This month it's 20% off Jelly Rolls or 2 1/2" strips.


Next, is a card giving you information on all the enclosed goodies.


First up is the Petite Shades of Summer  2.5" Rolie Polie valued at $17.98.


Sew pretty....

Next we have the 1" size half square triangle paper valued at $10.98.
Wow, this roll makes 630 half square triangles!


I have never used the half  square triangle paper before so I'm pretty excited to try this out.

Next up is a sampler pack of Magic Pins valued at $12.98.
This is a pack of 19 pins.


Honestly, I'm not sure I would pay $12.98 for 19 pins, but I love that I can sample different types of pins before I buy a whole pack of something I may never use.
So, I'm pretty happy to have a sample of each.

The next item was a bit strange to me until I googled all the many uses.
Hugo's Amazing Tape 1/2" x 16.6 yard roll valued at $7.24.


It's pretty handy stuff.
I'm just afraid once Mr. Fisherman sees all the uses for this amazing tape he will snatch it up and I will never see it again.

Now, on to the patterns included...


OMG! This is so adorable!
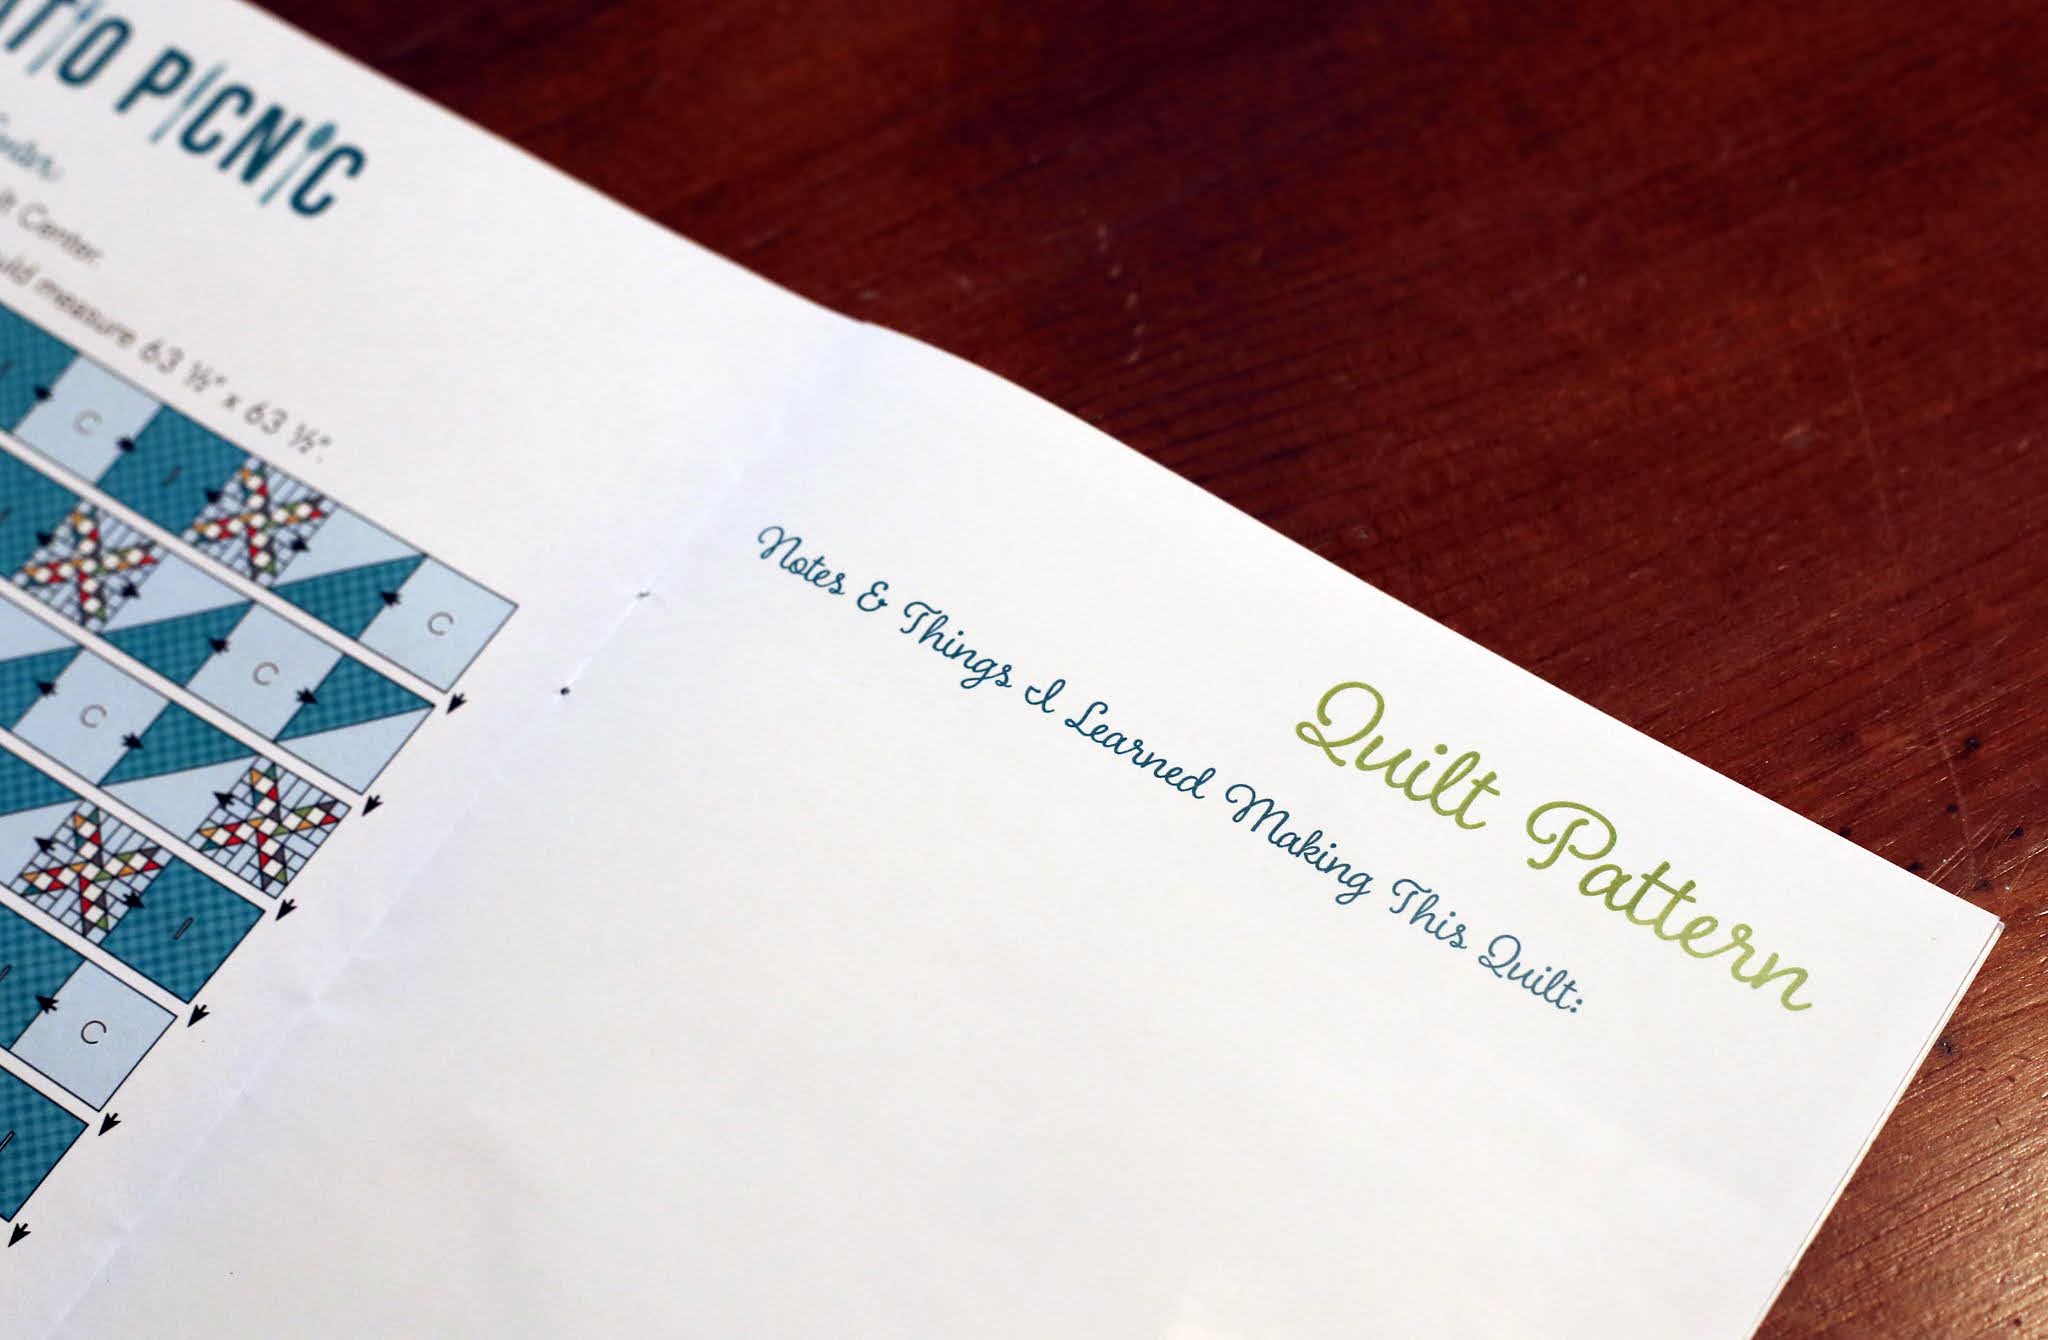
It's called Patio Picnic and comes in 2 sizes (lap version and throw version) valued at $9.98.
The pattern is designed to use your Petite Shades Of Summer Rolie Polie and the 1" half square triangle paper.

 Fat Quarter Shop had posted a sneak peek of the July 2020 box where everyone had a chance to guess the theme for this month.
 Several guessed a "Christmas in July" theme.
Personally, I'm happy they chose a summer theme instead of "Christmas in July" theme.

They also include a BOM (block of the month) pattern valued at $4.98.
This is called Greatest Hits Album Quilt.
Track # 4 


Check it out....


Even the inside of the box is cute!

I added up the value of everything included and it came to $64.14.
Not a bad deal for $24.95.
What do you think?

Saturday, July 18, 2020

Lucy Sews

Has anyone noticed the new photo on my sidebar in the About me section? 🠞

I am redecorating my sewing room and needed something new for my wall.
 
This took a lot of 4am sewing but it's finally done.
It measures 21 x 21.


This was so much fun to make.
I just made it up as I went along.

I have never been a fan of raw edge applique, but I thought I would give it a try since this is totally mine for my sewing room.

The background behind the sewing machine is pieced with a variety of green scraps.


Since I knew this was something that wasn't going to be washed frequently, I did raw edge applique around the sewing machine, scissors, thread spools and parts of the banner.


The pincushion and the cherries are both machine applique designs.

 
I am now a HUGE fan of raw edge applique.
I will definitely use it again. 
It was so much fun!

Have a great weekend everyone.

Linking today to:


Wednesday, July 15, 2020

Lost and FOUND!

Despite Mr. Fisherman's comment on my last post ðŸ˜‰...

I found it!


I found it between a stack of folded fabrics. 
Why I put it there, I haven't a clue.

I am going through all my UFO's (unfinished objects) and trying to get them completed.
I have things I started years ago and never finished.
I either got bored with the project, didn't like the way it was looking or wasn't quite sure how I wanted to finish it.

While I'm in this "better done than perfect" mood, I thought I would drag them out and finish them - good or bad.

I didn't have quite enough of the green polka dot fabric to make a nice binding, but I gave it a shot anyway. 
I had a hard time pulling it around to the back to stitch it down.
It was way too narrow for binding, which is why it looks a little wonky.


Well, maybe A LOT wonky....


But, it's done and I'm on to the next UFO.

Monday, July 13, 2020

Lost

I started this little wall hanging well over a year ago.


I have no earthly idea where it is.
My niece was coming to visit and I needed to transform my sewing room back into a guest room for her visit.
At the time I had been working on this little wall hanging.
I remember carefully folding it so the batting and backing wouldn't shift and stashing it SOMEWHERE.


I've looked in all the obvious places.
Nope.
Really haven't a clue....

My mission today will be searching every nook and cranny of my sewing room until I find it.

Wish me luck!

Friday, July 10, 2020

Three Dudes Quilt - finished

One reason I thought I would get back to posting a bit was the following comment on April 25, 2020 asking about the Three Dudes Quilt.

"Hello I realize this post is 5 years old. Just wondering if you have a posted a photo of this quilt finished? I would love to see how it looks. Thanks so much. Deb"

Wow! Five years ago. Really?
You can see that original post here.

Anyhow, I am a little embarrassed to say....
I just finished this little lap quilt a few months ago.


One good thing about Covid-19 (if you can call ANYTHING good) is that I have been going through my unfinished projects and getting them done.

I had the top pieced way back when, but no border, backing or binding.
Searching through my stash I found some black fabric for the border and a large piece of green for the backing.

Since this is just a small lap quilt (33" x 43") I decided to try the self-binding method of  bringing the backing around to the front to make a mock binding. 


I will say, it was really easy and came out nicely.
I will definitely use that method again on smaller quilts or wall hangings. 


I did a easy stitch in the ditch and straight around each block to quilt it.

 
Here's a close up of the blocks.


Very bright and cheery.

I also wanted to thank Deb who commented back in April asking about this quilt. 
I think that comment gave me a little push to start blogging again.
😊
Hope everyone has a great weekend.
See ya next time.


Wednesday, July 8, 2020

Hello Everyone

It's been quite sometime since my last post.
Honestly, I just haven't been in the blogging mood.
Don't know why.
I'm still sewing and crafting and have plenty of things to share.

Rather than buying more fabric I have been trying to lighten my stash pile. 
Do you ever go through your stash and wonder what in the world you were thinking when you bought that piece of fabric?

Here's one of mine.
I literally haven't a clue what I was thinking.


Super ugly....
Anyhow, I thought maybe if I cut it up into smaller pieces I could hid the ugly.
Again, not really sure what I was thinking.

I found this free Floating Star pattern  on Jordan Fabrics and thought I would give it a try.

It's very similar to the No Point Star from Cluck Cluck Sew I did here.

Jordan Fabrics made a wall hanging using the Floating Star pattern.
 I decided just to use the Floating Star and make a table runner.


I will say, cutting it up didn't help a whole lot to make it any less ugly.
It's a bit busy.


Rather than using it as a table runner I decided to hang it on my antique wooden ladder for decoration.

I have yards of the red and white star fabric leftover and made the little quilt as you go flag wall hanging following a You-Tube video by Fat Quarter Shop.
It was a super quick afternoon project.

Hope everyone is staying safe at home.
See ya soon.