Showing posts with label tutorials. Show all posts

Monday, November 16, 2015

Quick and easy fall napkins, tablecloth and table runner

I am hosting a very small, casual dinner Saturday night.
 
I prefer cloth napkins; they are super simple and quick to sew.
 
 I scoured my stash and found this pretty fall fabric.
 
 
I like my napkins big, and I had just enough fabric to make 6 - 20 inch napkins.
 
I cut my squares.
 I measured and folded the hem double the size I wanted my finished hem to be.
 

Press so you have a crease at that measurement.

 
 Now, open the first fold and meet the raw edge to that crease.


Fold over again...


pin...
 
 
...and stitch.

 
 I find this method easier than trying to fold over a tiny hem first and then folding up a second tiny hem. Pressing the larger hem first and meeting the raw edge to the crease of the first measurement seems to make it easier and more accurate.
  
How easy was that!


Did you notice my tablecloth and table runner?


The table runner is a piece of burlap with the edges frayed.

My tablecloth is just a couple of yards of fabric with a serged edge.


I love to sew table linens, and have a linen closet to prove it!

Happy Monday, everyone!

Wednesday, October 28, 2015

Embroidering on burlap


You may think embroidering on such a loose weave fabric might be close to impossible.
 
Nope.
 
I'm here to tell you... it's easy - you just need to take a few precautions.
 
First, I never hoop my burlap for fear of stretching or pulling the weave.
I use water-soluble stabilizer in my hoop and carefully pin my burlap in place.
After placing my hoop into my machine and before I start stitching I add another piece of water-soluble stabilizer on top to keep the stitches from sinking into the large loose weave.
 
Stitch as usual.
 
Carefully cut away (do not tear) the water-soluble stabilizer as close to your design as possible.
Using a damp cloth, carefully dab the water-soluble stabilizer on and around your design until all the stabilizer has completly dissolved.
Iron your burlap to dry and smooth out any wrinkles.
 
In the above photo I added a ruffle to the ends of my table runner using a small zig zag stitch.
 
If you prefer, (to keep your burlap from raveling) you can just finish off the edges using a small zig zag as in the photo below.
 
 
On the projects below -  I did both...
I added a ruffle on the short end and finished off the sides with a small zig zag stitch.


I stitched these projects before thinking about making a step by step tutorial with pictures.
 I you have any questions just shoot me a quick e-mail or comment and I will be glad to answer any questions.
 
Hope you will try give burlap a try.
It's "sew" easy.


Sunday, June 14, 2015

Crying over spilled....... coffee?


Not me.
I just cut the stain off and keep going....
 
 
Before the coffee stain this was a perfectly good (almost new) bar mop towel.
 
Rather than throw it away, I chose to repurpose this baby into a new washcloth using a bit of bias tape and embroidery.
 
 
Here's how it went...
 
After cutting off the stain I had enough left to cut an 11 1/2 square from the remainder of the bar mop.
 
I then rounded my corners using my fancy schmancy French curve.
 
 
If you don't have a French curve, you can use a coffee cup or saucer to round the corners.
 
 
I serged the edges to keep the towel from raveling.
 
 
 If you don't have a serger, a zigzag stitch will work just fine.
 
  Open your bias tape and pin it right side down on the serged edge.
 
 
Pin all the way around leaving about 2 inches overlap at both the beginning and end of your bias tape. 
 
 
Pinch the overlapped ends together as below and mark the point at which they meet.
 
 
Stitch across this line and trim to 1/4 inch.
 
 
Lay your bias tape flat again and continue pinning.
 

Using a straight stitch, stitch on the fold all the way around.
 
 
Once you have stitched the whole way around, wrap the bias tape over the serged edge to the other side and pin.
 
 
 I usually use the "stitch in the ditch" method to finish sewing my bias tape, but decided to try something different. I used a small zigzag stitch and stitched from the pinned side. I zigged on the towel and zagged on the bias tape....in other words, make sure you catch the bias with one stitch and the towel with the other.
 
You can barely see my zigzag stitches from either side.
 
 
You can stop there and have a perfectly cute washcloth...
 
 
....or add a bit of embroidery.
 
 
And have an even cuter one!
 
 
I'm thinking about stitching up a few more to have on hand for quick gifts, adding
 facial cleanser and a head band.
 
 
 See....
 
 
no need to cry over spilled.... coffee.
 
 
Just cut it off and move on....
 
Happy Monday!
 
 
Linking today to:

Sunday, January 4, 2015

Sew your way to organization in 2015


I'm sure many of you have made the commitment this year to finally get organized.
 
Well... I'm here to help!
 
I scoured the net and found some pretty cool sewing projects to help you get started.
 
All free tutorials - we LOVE that!
 
In no particular order....
 
This handy little organizer from The Glamorous Housewife
 
 
Pot holder purse caddy by Fun Cheap or Free
 
 
Hanging file folders by Cottage4c
 
 
Small organizer basket by Pink Penguin

 Trays in Sew Cherry

Remote control pillow by Make it Handmade

Want a way to hide those pesky remote controls? This clever pillow keeps those remote controls out of site, but right at hand. Sew one for yourself with this tutorial from Make It Handmade. 
Reusable car trash bag by How Does She

Messy Car Solution

Dave Ramsey cash envelopes by Jar and Jug


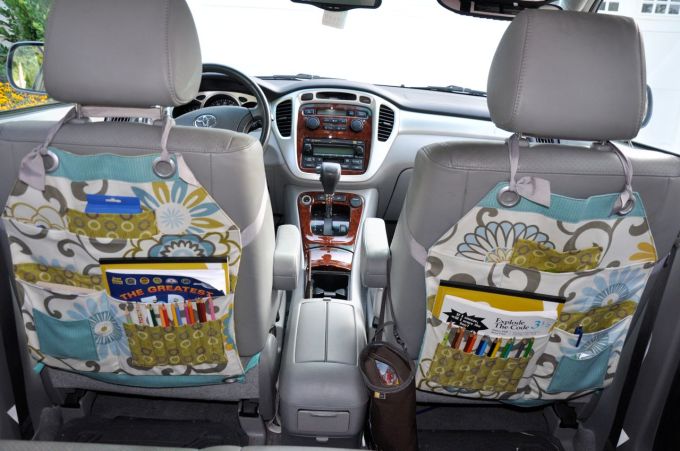
Car seat organizer by 8th Day Creations


Handy mesh shower caddy by So Sew Easy

Use mesh fabric to sew this shower caddy or organiser

Book slings by Domestic Imperfection

How to make book slings

Mini pocketbook by Insatiable Needs

finished product!

Makeup brush roll - Better Homes and Gardens


Sofa organizer by Art Gallery Fabrics

Cover_web

Clear bag tutorial by Patchwork Posse

clear bag tutorial with zipper top | patchwork posse

Fabric bins by Birch


Travel cable cozy by Makezine

liveitloveitmakeit_travel_cable_cozy_02

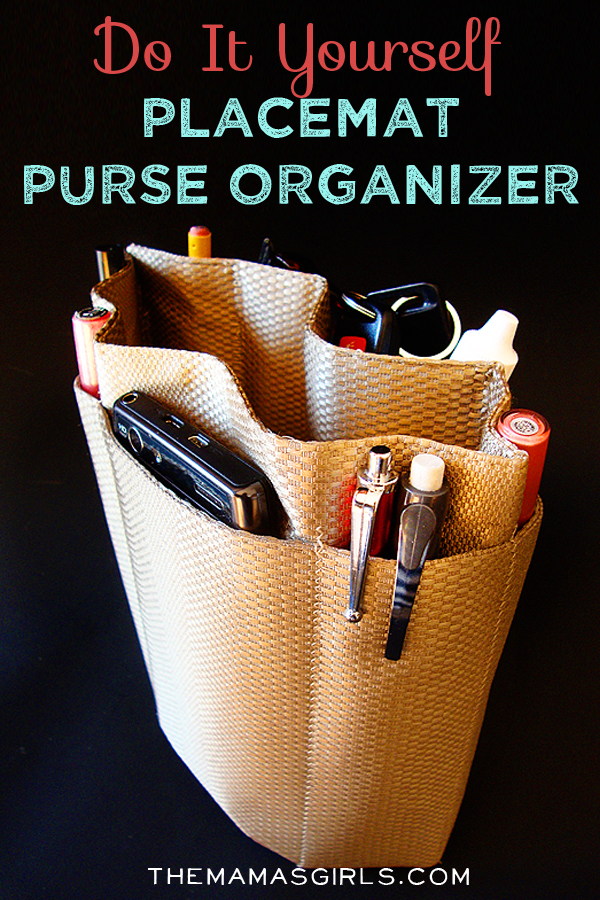
Placemat purse organizer by The Mamas Girls

Do It Yourself Placemat Purse Organizer

Hanging makeup organizer by A Girl With a Glue Gun


makeup hanger for your bathroom

Shopping list holder by Lark Crafts


Peek-A-Boo toy sack by Make it Perfect


Car visor organizer by It's Always Autumn


Sewing AND organizing ???

I call that a WIN,WIN...how about you?