Sunday, October 31, 2010

A "not so scary" spider...


Isn't he cute?


This is a very easy project for a beginner.
You don't need an embroidery machine; you can use a preprinted tee shirt and add a matching ruffle.


When I made Oakleigh's dress, I left the tee shirt the same length
and added a longer ruffle.
For this one, I cut a few inches off the bottom of the shirt first and made the ruffle shorter; this way it can still be worn as a shirt.

With a few added accessories, Polly is ready for a night on the town with her
best "ghoul" friends!

Happy Halloween!


Thursday, October 28, 2010

I've been a little busy lately....


working on my daughter and granddaughters Halloween outfits.
Oakleigh, my granddaughter, is going to be Minnie Mouse for Halloween but she still needs something festive to wear during the day, right?
I try not to do "Halloween" so that she will be able to wear it more than once. I just chose the colors of Halloween and made a dual purpose bag to match. The crayon bag can also be used as her "loot" bag for trick or treat if she wants.


The dress started out as a tee shirt. I just added a ruffle and a few embellishments.


Of course, I couldn't send the bag empty. I filled it with a Halloween coloring book, lollipops, crayons and pencils.
I am finishing up my daughters outfit and will post it tomorrow....
See ya then!

Linking today to:

Sunday, October 24, 2010

Don't try this at home!!!


Unless, of course, she is your best bud...


and you can get away with it!

A dishtowel for Debbie.


Saturday, October 23, 2010

Fabric Takeout Box


You can make this Fabric Takeout Box in any fabric you like, or any occasion....


I chose Halloween


My daughter doesn't trick or treat anymore; instead I made her this Take Out Box and filled it with goodies.
I think this is perfect for the older ones who think they have outgrown going door to door.

It's also perfect "wrapping" for a small gift for any occasion.

Linking to:

Thursday, October 21, 2010

Another little "thank You".


Just for Stephanie...


Same idea as this, just a little different design.
Have a great day!

Wednesday, October 20, 2010

More Fall Decor

Before...


and After Mr. Fisherman discovered the candy corn!


Tuesday, October 19, 2010

It's all about the pumpkins...


These little pumpkins were really fun to make.

Doesn't take much to make them; all you need is just a few fabric scraps and fusible Peltex.


I love the little frayed edges.


All I did was iron my fabric onto fusible Peltex. 
I then drew and cut out the pumpkin, leaves and stem.
Once they were all cut out, I sewed a few stitches to define the pumpkin, the stem and the veins on the leaves. No embroidery machine necessary.
I then layered the pieces and used a button to "tie" it all together.

Side view...


You can see from the back view, it looks a little messy.


Not to worry.....


No one will ever see the back!

Linking today to:

Monday, October 18, 2010

Notice anything different?


I have been playing around with my banner.


It's not exactly perfect, but I'm happy with it for now.
What do you think?
Photobucket

Sunday, October 17, 2010

Fall Decor


I love Halloween, but Mr. Fisherman does not, so I compromise and just add a few tiny bits of Halloween to my fall decor.


Like my spiders and ravens...


and my "oh so scary" BOO banner made from fabric and felt....


Isn't it cute?
I purchase the embroidery design for this banner from Embroitique.
When you purchase the design it comes with the letters A thru Z and a blank to add your own design. The "B" was stitched using the Embroitique letter "B", but I found it took a very long time to stitch out and felt it used WAY too much thread just to stitch the lettering. The letter "O" came from another font I had. 
Don't misunderstand.... I LOVE this little banner design and would purchase from Embroitique again.
I just chose to use a much quicker font for my design. 

Saturday, October 16, 2010

It has been brought to my attention....


not everyone uses a pastry cutter to chop eggs for egg salad...


Geez, why not?


Could it be any easier than this?


Friday, October 15, 2010

Happy 101 Award ?


I couldn't be happier to be to accept this award thanks to Kara over at Mine for the Making.
How sweet of you to think of me. 


Here's how it goes...

1.Post who it was that gave you the award.
2.List 10 things that make you happy.
3.Give this award to 10 other blogs and let them know with a comment

Sounds easy enough, right?
Not so easy..... I have sooooo many blogs I love, it's hard to choose, but here goes....

10 things that make me happy:
(no particular order)

1. The comfort of Family
2. My daughters laugh 
3.My best bud, Debbie
4. Sunshine
5. The sounds, smells and feel of the ocean
6. The smell of fresh cut lawns
7. Memories
7. Being a "Mimi"
8. A warm brownie with a scoop of chocolate ice cream covered with chocolate syrup
9. My Husquvarna sewing machine

Thursday, October 14, 2010

Kember's baby shower gifts


First, I want to thank my blogger buddies for your well wishes.
I am about 60% back to normal and hoping to be 100% soon.

And... thanks to "Mr. Fisherman", my sweet hubby, for letting everyone know I was a bit "under the weather". Although it was very sweet of him to post for me, I became a little concerned  he would start entertaining you with fishing, hunting or
some sort of auto part stories....
 I thought I better get back in the swing of things VERY quickly!

Now that the baby shower is over, I thought I would share my finished projects.
(I did not make any of the onsies or pants - just embroidered on them).

We all know what little boys are made of, right?
Of course we do - snakes and snails....


And of course sports...
Grandpa's fishing buddy shirt...


Basketball....
A long-sleeved onsie with basketball hoop and initials, blue jeans and a matching burp.


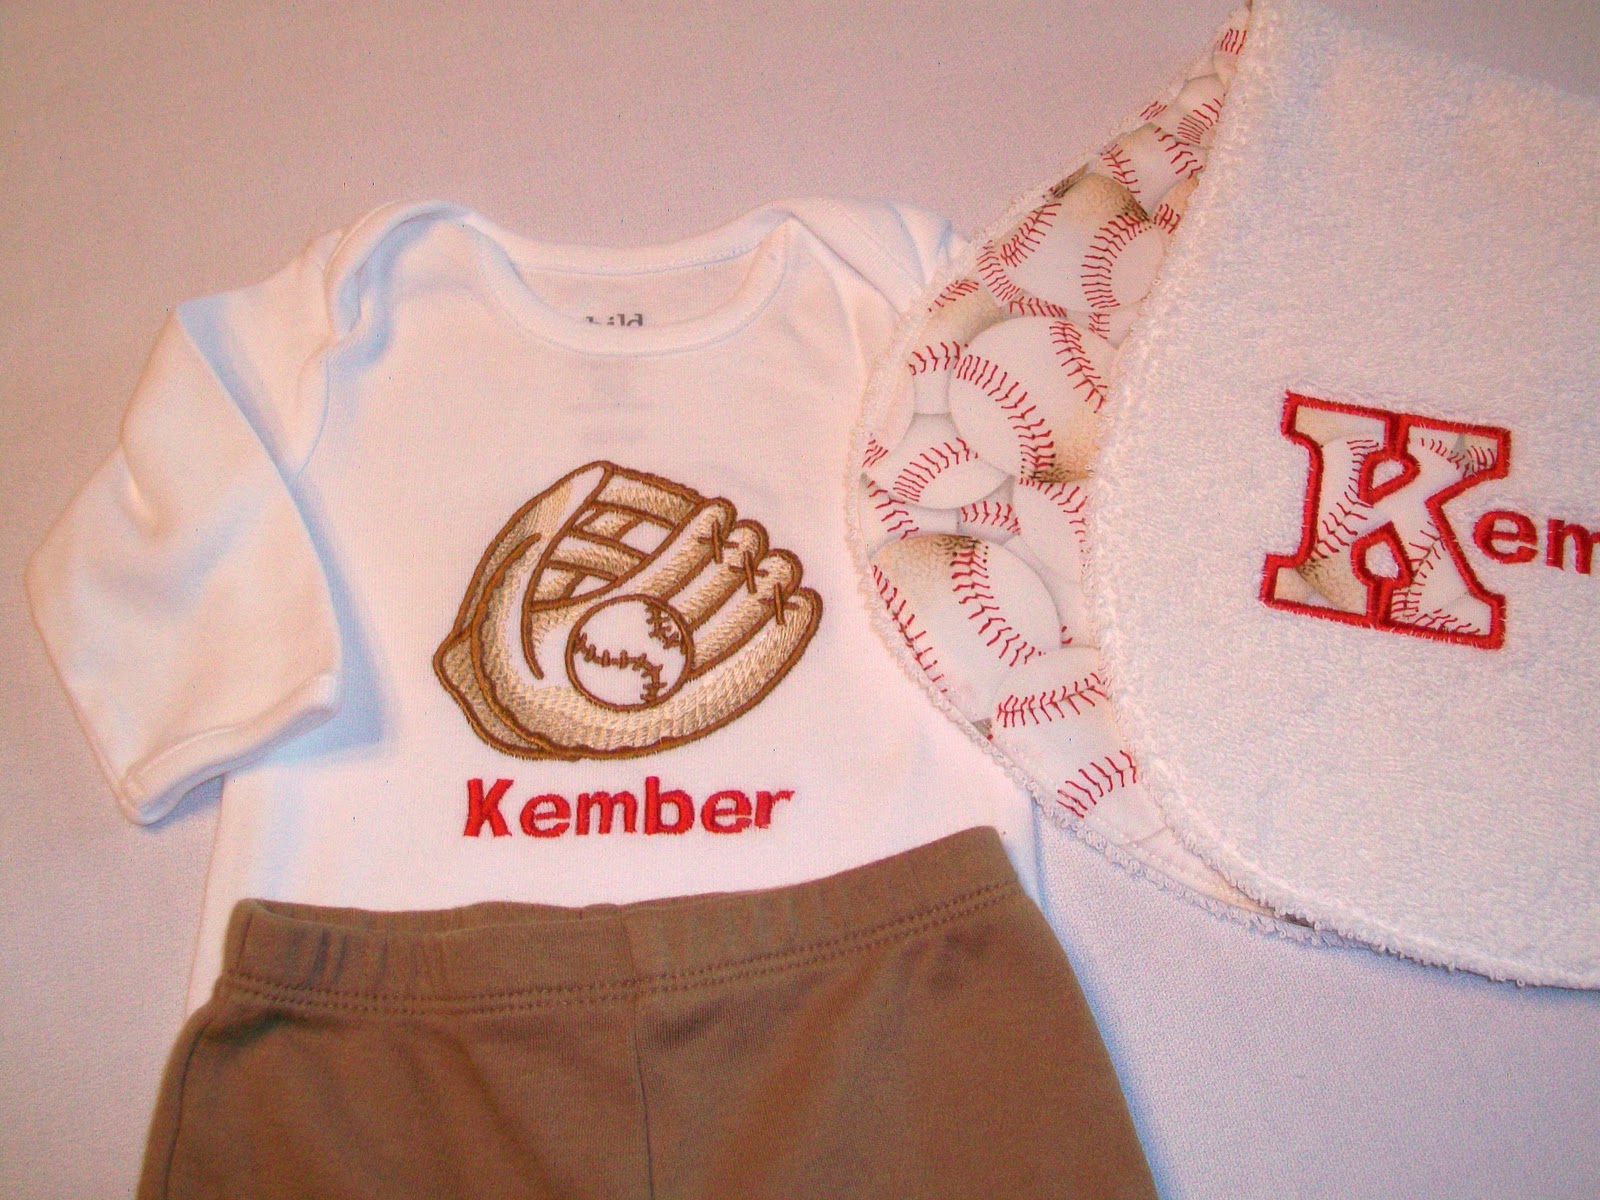
Or maybe baseball....


I just love this baseball fabric.


For the matching burps I cut the fabric in a "peanut" shape and used terrycloth
for the embroidered side.
Very easy project.


A few more outfits....


I  thought this little tow truck was cute and just wanted to incorporated his name into the design.


Again, just used terrycloth for the bib and a soft denim for the back.


Zippered pouch for the baby wipes


How simple this was to put together.
I found the hooded towel at Target, the washcloths and the cute little blue duck
 at Wal-Mart.


Okay, THIS ONE I will have to explain.....
You see.... Kember is named after his Daddy's favorite gun manufacturer, his sister, Oakleigh, was named after the sunglasses. The spelling was changed on both - from Oakley to Oakleigh and Kimber to Kember.


Here is the basket before wrapping.
I also included a baby blanket, baby powder, baby wash and a football.


All wrapped and ready to go.


Of course the package could not go out without something in it for Miss Oakleigh...
A backpack, coloring book, stickers, I'm a Big Sister book and a "big sister" tee shirt.


Whew! I think I am done for now.
If you want something more girly, check out Oalkeigh's basket here.


Linking today to:

Sunday, October 10, 2010

Under the Weather


Sorry Gang,


Lucy has been under the weather for a week now but getting better and will return in a few short days.
Not to mention she became ill about the time our guest's arrived in from out of town, but she carried on like a "trooper", now its time for rest and recuperation.

Hopefully I can keep her from passing it on to me !
Mr. fisherman  
                                                                           
 Lucy says "hi" to all.

Sunday, October 3, 2010

Sneak Peek


The baby shower for Kember is this afternoon.
 Unfortunately, it's out of state and I am not able to attend. I can't reveal everything yet, but here is a little sneak peek of the package I mailed last week.


Of course, the pink in the box is for his big sister, Oakleigh.

Friday, October 1, 2010

My $1.09 pillow


Now that I am done sewing baby shower gifts, I am on to decorating for Halloween.
 But first, I need a few pillows for my new black and orange decor.
Here's what I came up with after scouring my stash of many things....

I found these placemats I bought months ago on sale for $.25 each - of course I bought 10 of them.


Checked my stash of zippers....

 
found a $.59 zipper I bought at a local thrift store...


Using a travel size pillow I already had, here's what I came up with....


It took me about 20 minutes and $1.09 to make.
I sewed the zipper in one end, stitched around the other 3 sides, turned it right side out and zipped it up.
Easy as that!


It fit perfectly.

Today's link: